Welcome to our comprehensive guide to improve loading speed on WordPress websites! After you apply the changes mentioned in this article you will likely see a significant decrease in loading time. This guide should help make your WordPress site fast.
Sections
Introduction
 The latest Google search algorithm incorporates page loading speed into the rankings. If your website doesn’t load fast enough you might be losing both visitors and search engine ranking.
A study by Microsoft showed that a 2 second longer delay in page loading led to 3.8% decreased user satisfaction.
Luckily there are a few easy ways to decrease page loading speed that I will discuss in detail below, and also answer any questions you have in the comments section.
Test your Site to Determine the Baseline Speed
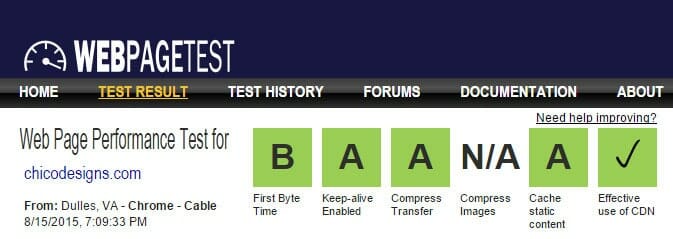 A lot of web developers skip the baseline speed test, but it’s important to be able to see if the changes you make to the site actually made any difference.
My favorite website speed test is: http://www.webpagetest.org, other popular ones to check out are https://gtmetrix.com and http://tools.pingdom.com/.
Test a few different pages of your site and write down some of the load time results for comparison. If you use webpagetest.org you can create a profile for free and it will save your test results so you can look at them later for comparison.
Choose a FAST Web Host
If you haven’t chosen a website host yet and want budget hosting check out MidPhase for fast reliable shared hosting for less than $5 per month.
If you are looking for high quality specialized WordPress hosting try WP Engine. WP Engine is considered by many experts to be one of the fastest WordPress hosts.
Enable Mod_deflate Server Compression
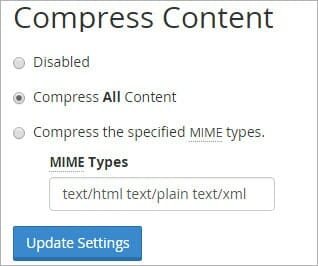 Apache HTTP Server 2.0 and newer allow you to compress content sent between the server and visitors. If you are using shared hosting there is a good chance it’s running Apache and you can use mod_deflate to compress content and speed up loading time.
If you have cPanel installed on your server you can enable server compression by going to Optimize Website, under the Software section and enabling compression on all content or specific content types.
If you don’t have the Optimize Website option in cPanel, you can still enable it on Apache 2.0 servers by adding this line to your .htaccess file:
AddOutputFilterByType DEFLATE text/text text/html text/plain text/xml text/css application/x-javascript application/javascript
Enable Keep-Alive Connections
 Keep-alive means that your server will make one connection to a visitor and transfer multiple files to them at once, rather than connecting separately for each file.
It can significantly speed up your site, and save server resources. If you are not sure if your site has keep-alive enabled or not you can use this keep alive website tester.
To enable keep-alive connections add the following code to your .htaccess file:
<ifModule mod_headers.c>
Header set Connection keep-alive
</ifModule>
Install CloudFlare
 CloudFlare offers a free content delivery network, improves website security, and will speed up your site.
It might be a little bit more of a hassle to setup CloudFlare than just installing a plugin, but it’s worth it, and should only take about 5 minutes to configure.
After you sign up for an account, type in your website address, continue through the process until they give you the new nameservers for your site.
Login to your domain hosting company and set custom nameservers to the ones CloudFlare gives you.
If you have questions or need help setting up CloudFlare leave a comment, or send me an email and I’ll help.
Use an Optimized WordPress Theme
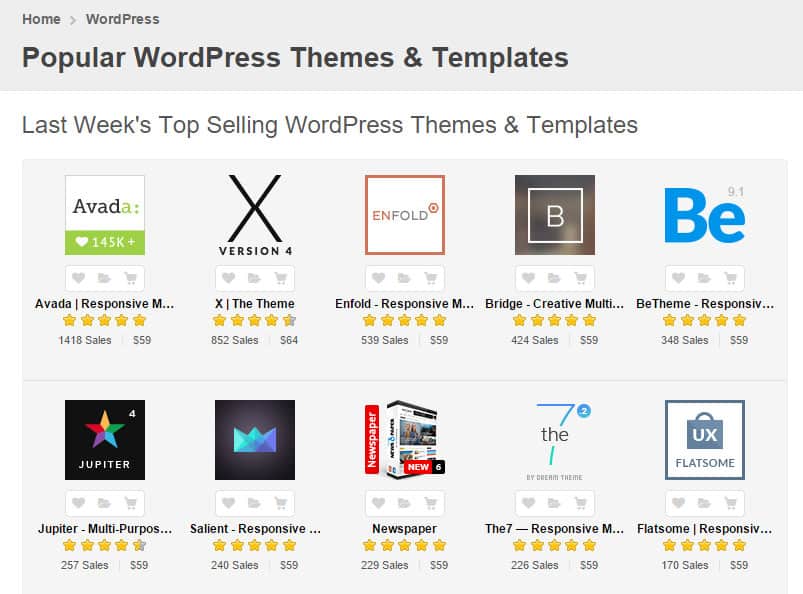 Not all WordPress themes are equal. Some are much better designed than others. My favorite marketplace to look for themes is ThemeForest.net.
Almost all WordPress themes have a live demo online. Before purchasing a theme run some tests on it to make sure it’s fast and doesn’t have any error
All of the themes on Theme Forest come with lifetime updates (but some will be discontinued). To increase the changes that your theme will continue to be updated I recommend getting one of the more popular ones, like one from the top 50.
To test if a WordPress theme (or any site) has errors
1. Visit the theme demo using Chrome as your browser.
2. Right click on a blank part of the page then click, “Inspect”. An alternative to the right clicking method is to use Crtl-Shift-I.
3. A window should pop up with code and other information. If the site has
 an error it will show a red circle with an X in it. If a site has a warning it will show a yellow triangle with exclamation point. The example image shows 3 errors and 1 warning.
Three free tools to test a theme demo website
They do pretty much the same thing, but you might want to check them all out to decide which you prefer.
I personally like Web Page Test the most, but have heard others say they like GT Metrix.
Web Page Test – http://www.webpagetest.org/
GT Metrix – https://gtmetrix.com/
Pingdom – http://tools.pingdom.com/fpt/
Install WordPress Caching Software
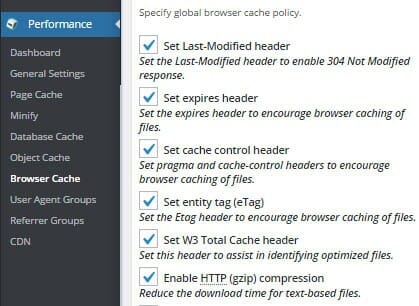 I recommend using W3 Total Cache, a free WordPress plugin. Once installed it creates a menu item in the admin area of your site called Performance.
Under Performance > General Settings, enable page cache, and browser cache. Under Performance > Browser Cache I recommend using the same settings as in the image.
These options should work fine with a standard shared hosting account or premium hosting account. Minify can also be used with most shared hosts, but I have had issues with objects and CSS not loading correctly on the frontend using some minify settings, so test it to make sure it doesn’t cause any issues.
To test the site browser comparability I testing the site using Chrome, Firefox, and Microsoft Edge.
Utilize Browser Caching
 Browser caching is when the browser stores specific types of content on a local computer so that it loads faster on subsequent visits.
Many of the cache plugins like W3 Total Cache include the ability to leverage browser caching, but if you are not using a caching plugin for some reason you can enable it by adding this code to your .htaccess file:
<IfModule mod_expires.c>
ExpiresActive On
ExpiresByType image/jpg “access 1 year”
ExpiresByType image/jpeg “access 1 year”
ExpiresByType image/gif “access 1 year”
ExpiresByType image/png “access 1 year”
ExpiresByType text/css “access 1 month”
ExpiresByType text/html “access 1 month”
ExpiresByType application/pdf “access 1 month”
ExpiresByType text/x-javascript “access 1 month”
ExpiresByType application/x-shockwave-flash “access 1 month”
ExpiresByType image/x-icon “access 1 year”
ExpiresDefault “access 1 month”
</IfModule>
Don’t Use Too Many Extra Plugins
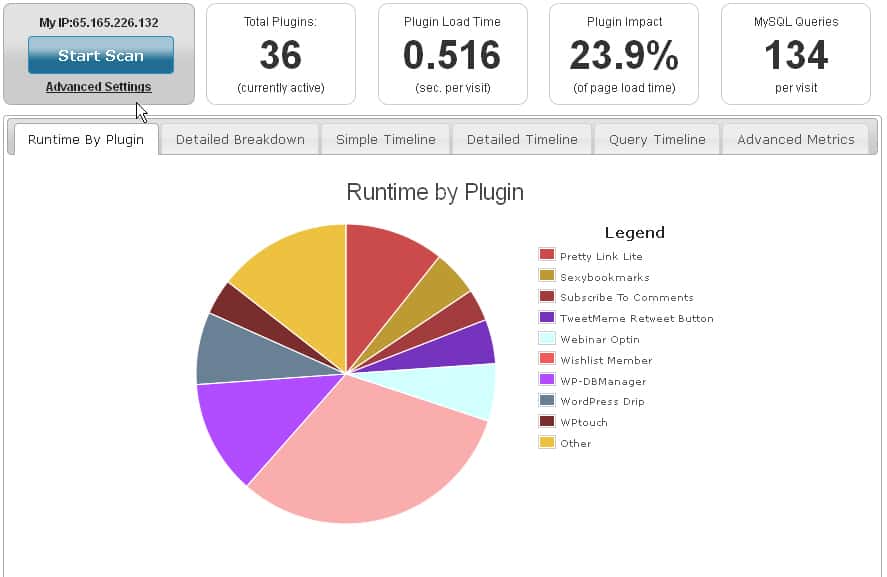 Plugins can significantly slow down your site. Many are poorly written or have errors.
Professional WordPress developer try to install as few plugins as possible, and are selective about which ones they use.
Some plugins will load resources from an entirely different website every time a page is loaded, such as Facebook like buttons and Twitter feeds.
There is an easy way to determine which plugins are slowing down your site, install P3. P3 is a free WordPress plugin that tells you exactly how your plugins are affecting load speed.
Keep your Database Clean
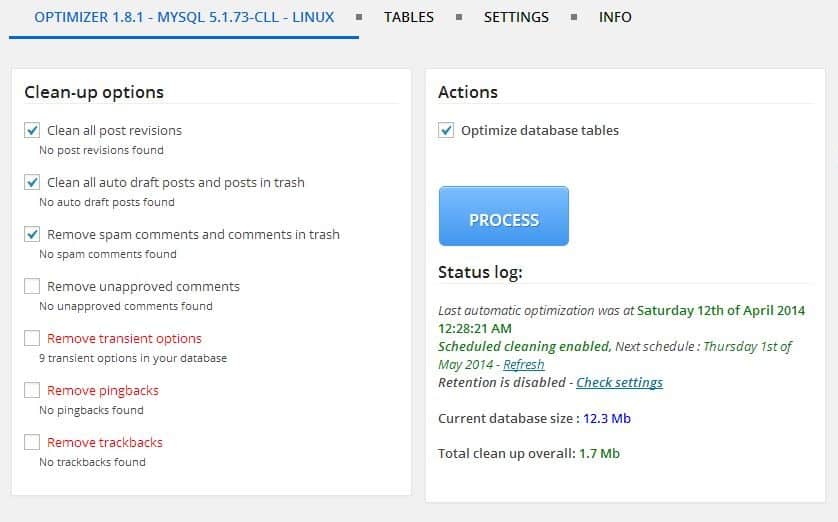 The easiest way to keep the database in top shape is to use WP-Optimize.
You can enable scheduled cleanup and optimization under the WP-Optimize auto clean-up settings. Set it to automatically optimize your site every week or month to keep your database clean.
Using WP-Optimize is much more convenient than logging into phpMyAdmin and optimizing the database manually, but you can do it that way to avoid installing the plugin.
Optimize Images
There are two good image optimizer plugins I recommend checking out: WP Smush.it and EWWW Image Optimizer.
We use EWWW on out site, it seems to work with more image formats than WP Smush.it. It also works with a few gallery plugins to optimize their images.
[2019] We now recommend Shortpixel Image Optimizer over EWWW and WP Smush.it. It has the option to use webp format images, which are significantly smaller than other formats. The webp version of images for this site is about 60% smaller, and are lossless, so look exactly the same.
Test to Determine the Improvement in Speed
 Now it’s time to compare your baseline speed test results with the test results after optimizing the loading speed.
It should hopefully load faster, and get better grades/ratings from the speed metrics site you use.
You can go into your plugins settings and tweak the options to try to improve the loading speed, such as configuring minify through W3 Total Cache.
Have some other ideas on making a WordPress site fast? Leave a comment below


